Friday, July 5, 2013

Veggie Fajita Grilled Cheese

I was going to make a quesadilla, but our tortillas were no longer edible after our trip. So I decided to go with this instead.


Ingredients:
Olive oil
White onion, chopped
Green bell pepper, chopped
Avocado
Salt
Pepper
Fajita seasoning

Potato bread
Butter (for browning the bread)
Munster cheese slices
American cheese slices

Prep:
I sautéed the onions and peppers in olive oil and seasoned with salt, pepper, and fajita seasoning. Then toasted the bread in a little butter on a skillet. Added the cheeses to the bread, dumped the peppers and onions on top, then let it melt open-faced for a minute. Lastly, I sliced the avocado (thickly) and dropped it on the sandwich and closed it up.

Assessment:
Pretty good. It of course had the thick creaminess you want from a grilled cheese, but I think that it could have used something to cut through, maybe pickles or lime juice. Of course, you can just have something like that on the side to balance the awesome cheesiness.

That's all for now. Peace!

Thursday, October 4, 2012

Just a Thursday Morning - Mac 'n Eggs

Just a Thursday Morning - Mac 'n Eggs


Expectations

I think that I kind of lost sight of the point of this blog. I started feeling like I needed to cook the most awesome, epic meals and take really amazing photos and document every little step in detail. But, as nice as that would be, that's just not how I work. So, from here on out, I'm going to let myself just post simple things. Here's an example.

McMuffin or Home?

I was on the verge of going through McDonald's and getting a McMuffin this morning, but decided to make the fiscally and creatively responsible choice to just come home and cook some eggs here. (Also, my orange juice is better and cheaper.) So I opened the fridge to see what I could throw in the eggs.

Some options were: onion, tomato, cheese, turkey, ham, yogurt, lettuce, carrots, green beens, and... leftover macaroni & cheese? I mean, I figured that I would probably put cheese in there anyway, and the noodle part is just a bread-like component, which goes well with eggs-- casseroles, sandwiches, tacos.

So I started with mac 'n cheese, then decided to go with green beens and ham and a little extra cheese-- relatively simple. 

So here are the pics.


Eggs. Yum.


Sandwich ham, chopped.

 Mac 'n cheese, leftover and not very exciting.

Beans in butter.

 Beans and ham in butter.

 And now with mac.

 Adding eggs, beaten with a little milk.

Tossed and scrambled.

To melt the cheese on top, I just use the plate to cover to get some convective heat. 

And the final result. It was really delish. :-)


Friday, July 13, 2012

Meat on a Stick

Overdue

It's been several months since I last posted about my culinary endeavors. There are a couple reasons for that. It takes some planning to take pictures of the ingredients and the cooking process. And I often don't make the effort to plan ahead or take the time to photograph stuff. So part of it is that I'm just lazy, but also, not very many things seem particularly noteworthy.

That said, I have had a few cooking adventures that are noteworthy that I intend to share. Going in chronological order would just make too much sense, so I'll start with the dish I made just yesterday and we'll just see what happens from there.

Meat on a Stick

For some reason, I love the idea of meat on a stick. Maybe it's a subconscious appreciation for the rustic manly nature of no-fluff eating. But then again, I kind of undermined that by plating it all pretty like. Well, whatever the reason, I like it. So that was my inspiration for this dish.


So here's the menu: 
Jamaican Jerk Beef Skewers
Cole Slaw
Mashed Potatoes

Emily and I invited some friends over, so I jumped at the opportunity to do something cool for dinner. I perused my Saveur magazines for recipes for a couple unfruitful hours before I finally came across a Jamaican Jerk Chicken recipe. I didn't feel like getting whole chickens like the recipe called for, so I decided to adapt it for beef.

Meat

Tri-tip hunk of meat.

First, I went to the store to get some beef. I wasn't exactly sure what cut to get. Sirloin and flank steaks seemed a little expensive, and chuck seemed too cheap, and I needed something that was easy to cut into strips for the skewers. Safeway happened to have big untrimmed cuts of tri-tip steak, so I decided to go for that. 

All trimmed up. 

After careful trimming of the fat and any membranous stuff I could see, I set about cutting the meat into strips.

Unequal strips. Still tasty.

The hard part about this cut is that it is not very consistently shaped. I made do and resigned myself to various sized pieces of meat. 

Mud? Brownies? No, marinade!

Then the marinade. The original recipe from Saveur was for 2 whole chickens, so I scaled it down to 2/3 of the original recipe (like 1/2 a cup of sugar instead of 3/4). As I added the ingredients together and mixed it up, it resulted in something that looked more like browny mix than anything else. 


I dropped the meat into the marinade and left all in a bag over night. Then I just skewered them up, and after everything else was prepped (see below), I threw them on a hot grill for about 2 minutes on each side.

In retrospect, the 1/2 cup of allspice was a bit much. I figured that would be the case going into it, but thought I'd go ahead and give it a shot. But as a fall-back against super-spiced meat, I shaped the rest of the meal to be able to balance it out. (Also, I modified the recipe below to reflect what I would do next time, rather than exactly what I did this time.)

Taters

I decided to do mashed potatoes as a nice mellow base and balance for the meat. Plus, mashed potatoes may be one of my very favorite foods in the entire world. It wasn't anything particularly special: about 8 small russets, boiled, and mashed by hand with some heavy cream, butter, salt, and garlic powder. But the result is absolutely amazing. The starchiness of the russets made them a little bit lighter and fluffier than yukon golds that I've used before. But then again, I haven't met a plate of mashed potatoes that I haven't loved. So any way you slice it (or mash it, haha!) potatoes+cream is a recipe for awesome.

Slaw

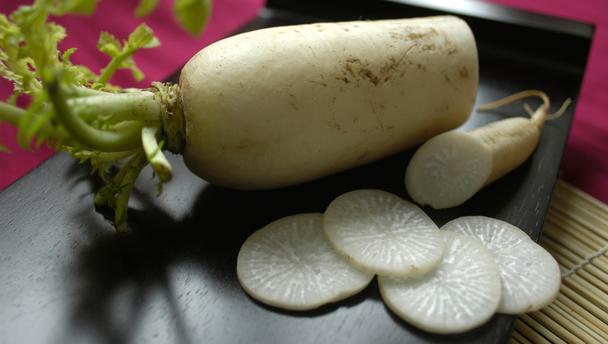
The bigger challenge that I laid upon myself was coming up with a homemade cole slaw recipe. As I was staring hopelessly at the produce aisle in the grocery store, I was trying to rack my brain to come up with some way of making cole slaw something other than mayo mush. My first idea was to use some of the unique Asian root veggies that are regular staples here in Hawaii. So in addition to the ol' purple and green cabbage and carrots, I added daikon. I say that very casually now, but that's only because I stood there and looked it up on Wikipedia at the store. Before yesterday I had no idea that it was a kind of radish, or anything else about it.

I got this picture from another website, but mine looked a lot like this.

Once I started chopping my vegetables, I gave the daikon a taste. It was pretty mild and quite fresh, kind of like a carrot. Then the spice kicked in. Whoa! Where did that come from? It kind of reminded me of a mild horseradish/wasabi kind of spice. It didn't linger too long, but a big bite of that stuff would have been a bit uncomfortable. Overall, I was happy with my choice and thought it would add a nice bit of variety to my cole slaw. 

Again, I failed to photograph this myself, so I had to steal.
But it looked kind of like this. Pretty, isn't it?

As far as prep goes, I cut my heads of cabbage into quarters and cut thin slices (about 1/16"-1/8"wide) until I had a big handful each of purple and green (about 3 cups each). If I was better at using the awesome mandolin slicer I got for Christmas, I would have used it for the daikon and carrots to julienne them. But I'm not, and I chose not to use this meal as a practice session. So I just use a knife and cut them into little slivers of crunchiness. Then I just tossed all that in a colander with a little salt to get it wilting and macerating, loosing its excess water into the bowl underneath the colander for about an hour.

Next was the sauce for the slaw. I didn't want to go to heavy-handed on the mayonnaise. That's just boring and gross. But I did want to have a bit of creaminess to temper both the daikon and the spiced meat. So I just used half a cup of mayo to start, added some rice wine vinegar (to go with the daikon Asian theme), a little mustard to add some depth, and then pineapple juice for an element of sweetness. I was pleasantly surprised that it tasted pretty good at that point, but just to touch it up further, I added a dash of dried ginger and some garlic powder. All in all, it turned out pretty darn nice. 

Finish


To plate, I just trimmed the bamboo skewers so that they fit better on the plate, and criss-crossed them on a base of mashed potatoes topped with the cole slaw. And for garnish, I cut some strips of green onion which curled beautifully on top.

Recipes

Jamaican Jerk Beef Skewers
Based on a recipe from Saveur magazine
Serves 6-8

Wet Rub/Marinade
1/2 cup light brown sugar
1/2 cup scallions
1/2 cup peanut or canola oil
1/4 cup ground black pepper
1/4 cup kosher salt
1/4 minced ginger
1/4 cup soy sauce
1/4 cup (about 6-8 cloves) garlic, minced
2 tbsp lime juice
2 tbsp allspice
1 tbsp dried thyme
1 tsp ground cinnamon
1 tsp freshly grated (or ground) nutmeg
1/2 tsp ground cloves
2 habañero chiles, stemmed and minced (or 1 tsp ground ceyenne or chipotle pepper)

Skewers
4 lbs beef (tri-tip, sirloin, flank, skirt, or other cut)*, trimmed and cut into approximately 6"x1"x1/2" strips
15-20 skewers for grilling

Directions
Combine all the ingredients for the rub (sugar, scallions, oil, black pepper, salt, ginger, soy sauce, garlic, lime juice, allspice, thyme, cinnamon, nutmeg, cloves, and chiles) in a large zip-top bag. Add the strips of beef to the bag to thoroughly coat with the marinade. Let it marinate in the refrigerator for at least 3 hours or overnight. 
If you use bamboo or other wood skewers, soak them for at least 30 minutes to minimize charring and burning on the grill. After marinating, remove the meat from the bag and skewer each strip. Preheat the grill on high to get the grates nice and hot, then turn down to low heat. Cook the meat about 2 minutes on each side (more or less depending on the thickness of the cut). Remove from the grill, and serve hot. 

Pineapple Daikon Slaw
Serves 6

Sauce
1/2 cup mayonnaise
3 tablespoons rice wine vinegar
1/4 pineapple juice
1 tbsp dijon mustard
1 tsp ground ginger
1 tsp garlic powder
1/4 cup parsley chopped

Veggies
3 cups purple cabbage thinly sliced 
3 cups green cabbage thinly sliced 
1/2 cup daikon julienned (more if you like a little extra spiciness)
1/2 cup carrots julienned

Directions
Slice and julienne the vegetables and put them in a colander inside another bowl. Sprinkle them with salt and mix. Let the mixture sit and wilt for about an hour, then discard the excess water that gathers in the bowl. Pat the vegetables dry with a paper towel to minimize excess water.
Add about 3/4 of the sauce to the vegetables and mix; add the rest of the sauce if you like it a little wetter. Cover and refrigerate for 1 hour, or up to 1 day in advance. 


Sunday, April 8, 2012

Easter Feaster! Spiced Lamb Leg

Full disclosure: this is not my recipe. I got it from about.com. I love that website. They have so many really awesome recipes, as well as articles to help educate a culinary noob like me. The downside is that there are very rarely any pictures to go along with it. And being the aforementioned noob, pictures help a lot. So I thought I would go ahead and document my experience in trying out this recipe for an Easter lunch we're hosting for a group of friends.

By now, you've probably noticed the first picture below. Yes, that is a BOX of wine. Some of you might be saying, "Yeah, buddy! That stuff is the best, and amazingly inexpensive!" Others might be saying, "What an abomination on the wine world! How could someone desecrate the delicate flavors of such an ancient art?" If you're in that second group, I've got news for you. Times have changed, and boxed wine is good. It is more eco-friendly, it's cheaper, and it's here to stay. And it stays fresh for several weeks. That's especially helpful if you only need a cup or so at a time for cooking and don't want to be peer-pressured by a glass bottle to guzzle down another 3 glasses.


After starting with a cup of wine, the recipe then calls for orange juice. That kind of threw me off, but I'm realizing that if I'm going to learn how to appreciate food and cooking, then I'll need to get out of my über-consumer American paradigm that says "I don't normally drink wine and orange juice together. That's weird and must not taste good." Rather, I should try to think more about food like that scene from Ratatouille. Each ingredient has something to offer, and combines uniquely with any other ingredient. So after overcoming my ignorance, I went ahead and added the OJ.


Next, 1/4 cup of chile sauce. If you read my quesadilla post, you'll know that I have no qualms about this ingredient. :-)


The recipe called for minced onion. I wasn't sure if it meant fresh minced or not, but I decided to go with my dried chopped onion. Dried stuff usually has a stronger flavor and works better in marinades. Hopefully I didn't screw it up.


A little veggie oil. No surprise there; marinades typically have an oil component.


And the choir of spices.


And this is what it looks like all mixed together. It smelled really good. (Wine+OJ FTW)


The recipe said to use a deep, non-reactive, pan. I figured that a typical 9x13 glass pan would be deep enough since there was only about 2 cups worth of marinade. So I plopped the pre-netted boneless lamb roast (thank you, Costco) into the pan, and poured the marinade on top. The dried onions seemed to have sucked up a lot of the liquid, and decided to just sit on top. Hope that's not a problem later.


Emily turned around from her decorating and mocked me saying, "Yeah, work it baby, work it!" Miming photo snapping. Apparently it amused her to see me taking multiple shots of a hunk of meat. Thanks, honey. Sooo supportive.


Getting back to the task at hand...

The only thing left at this point was to wrap it up and stick it in the fridge. I'll rotate it once every few hours until tomorrow afternoon.


24 hours later:

I took it out of the glass pan, put it in the roasting rack and poured the marinade on top again.


Then it went into the oven at 450 F for 15 minutes to sear the meat. After that, down to 350 for about 2 1/2 hours.

I don't have a baster, so I thought I could just reach in and spoon the juices over the meat. But I was foiled by the design of my roasting rack. I had to lift the rack out to reach the juices in order to drizzle them on top. Kind of a pain. I should invest in a baster.

I also had to add a cup of water 3 or 4 times to keep the drippings from burning. I think that the fact that my pan is quite wide contributed to my having to do this more than expected. But it's a good thing to keep in mind.


Here it is afterward. The onions got a little too charred on top, but it still turned out quite nicely.


After cutting the netting off, I poured the rest of the liquid and yummy fattiness from the roasting pan on top. Yum.


I was expecting it to be a little more red in the middle. The thermometer read just over 170 when I pulled it out, which is supposed to be "medium." Next time, I think I'll take it out around 165 instead.

All in all, it turned out to be super delicious! Especially with the mashed potatoes. Also, I probably could have used all those drippings to make a really awesome gravy. A silent tear for missed opportunities...


Again, many thanks to about.com for this recipe (see link above). I highly recommend it to anyone who has a hankering for lamb leg. Happy Easter! He is Risen!

Ingredients:

1 boneless leg of lamb, rolled and tied
1 cup dry red wine, such as Pinot Noir or Cabernet Sauvignon
1/3 cup orange juice
1/4 cup chili sauce
1/4 cup water
1/2 cup minced onion
2 tablespoons vegetable oil
1 tablespoon chili powder
1 tablespoon brown sugar
1 teaspoon ground cumin
1/2 teaspoon dried leaf oregano, crumbled
1/2 teaspoon salt
1/2 teaspoon ground black pepper

Preparation:

Place the lamb in a deep nonreactive pan (stainless steel, enamel-lined, or glass). Combine remaining ingredients in a bowl; pour over the lamb. Turn to coat well. Cover and refrigerate overnight or for up to 24 hours, turning occasionally. Drain lamb; place on a rack in a roasting pan. Roast in a preheated 450° oven for 15 minutes. Reduce temperature to 350°. Pour marinade over the lamb and continue roasting, basting frequently, for about 2 to 2 1/2 hours, or until done to about 170° to 175° for medium. Add a little boiling water to prevent juices from cooking down and burning. Let roast stand for 10 minutes. Carve and serve with skimmed pan juices.
Serves 8.

Thursday, April 5, 2012

A Worthy Beginning: Chorizo Black Bean Pineapple Quesadilla

I'm from Texas (more or less) and therefore have an eternal love for Tex-Mex. As such, I like to fancy myself somewhat of a Tex-Mex connoisseur. One of my favorite breakfast taco combos is egg and chorizo sausage. The chorizo has a nice smoky, slightly spicy flavor, and tends to ooze a scrumptious red out of the side of the delicious taco onto your hand or plate. I haven't had one of these in quite some time. Believe it or not, they're not as popular here in Hawaii as they were in San Antonio. So when I saw some in my local Safeway recently I picked up a pack to help quench my thirst for it.
Another staple of Tex-Mex is the quesadilla. Some may say that it's not "real" Tex-Mex, but I think the fact that it's on almost every Mexican restaurant menu I've ever seen means that it's legit.
My lovely wife Emily took a shopping trip for the evening, so I decided to do what I love to do-- root around the left overs and come up with something new. And that's what this blog is all about. Trying stuff, cooking new (sometimes odd) things, and eating it. Sometimes it's a flop, other times a home run.
Tonight was a home run night.

To hold me over while I picked out my meal, I grabbed the bowl of pineapple to munch on. Definitely one of the biggest culinary perks of living in Hawaii-- fresh, delicious pineapple.

So while loading up on scrumptious, acidic, yellow bounty, I looked at the stack of (mediocre, store-bought) tortillas and decided to make a quesadilla.

While I would never presume to underestimate the power of melted cheese, I wanted to add a little something more. Opened the fridge. Ding! Chorizo! So I browned (well, reddened) the chorizo to put on the quesadilla. Mmm... smelled awesome.

I remembered that we had some black bean refried beans in a can. (That's the brown lump pictured in the pan above. Not really necessary to warm it first.)

I popped it open, added it to the mix atop the cheesy tortilla. 2 min on each side. Done.

With a crispy tortilla shell and melty, meaty, beany inside, I took a bite and was decently pleased. But it seemed a little flat. It needed something with a little bite. Like pineapple! I took another bite of the quesadilla and then popped a piece of pineapple in my mouth at the same time. Holy smokes! That was amazing!
At that point there was only one thing to do-- make another one with pineapple slices inside. I ate it so fast that I almost missed it, but it was sooooo good.
So I'm officially adding this one to my repertoire-- the Chorizo Black Bean Pineapple Quesadilla. Mission accomplished.


For those who are more organized than I, here's an approximate recipe:

Makes 4 quesadillas

8 medium size flour tortillas
1 10 oz. package of chorizo sausage
1 16 oz. can refried black beans (low fat if that suits you)
16 oz. shredded cheese (or more if you're like me... balances the low fat beans)
1 cup chopped fresh pineapple (small enough so that it's not too lumpy in the tortilla)

Brown the sausage over medium-high heat (that's number 7 on my electric stove, fyi) until it separates and the fat is rendered. 
Put a separate pan on medium heat (number 5) and put in 1 tortilla and top with 1/4 of all the other ingredients: 4 oz. of cheese, 2.5 oz. of the chorizo, 4 oz. black refried beans, and 1/4 cup of pineapple. Put the other tortilla on top and let it cook for about 2 minutes until the beans soften and the cheese is melted. 
Very carefully flip the whole quesadilla over, supporting as much of it as you can with a spatula or other utensil so that the innards don't fall out (a true tragedy). Cook another 2 minutes on that side. 
Remove from the pan, cut into wedges and serve plain, or with whatever sides fit your Tex-Mex fancy-- sour cream, salsa, guacamole, etc.... Repeat the process 3 more times to use all the ingredients.